
Welcome to my zigzag xbase cuff tutorial.
This is the 3rd part of my xbase tutorial series.
The first two tutorials being the standard xbase and the dna xbase.
Next will be the heart xbase design.
This zigzag xbase is one x high.
Supplies

The supplies you will need are three colors of beads color 1, color 2, and base
Elastic string (I use bead n stretch from walmart)
Scissors are also needed of course.
The Single
As always we will start with a single.


First start with adding on one color 1 bead then two base beads
Then one color 1 bead then two base beads

You should repeat this until you have at least five of each color.
The last pattern should be your color 2 and two base beads.
Make sure you have an even number of color beads.


Tie off
Apply polish if desired
Cut extra string off
Your single should look similar to the single below.

Row 2


Then string on two color 1 beads and one color 2.
Go into the closest color 2 bead.
*as a rule you always add two beads of the color you just went through and one of the one you are going into.
What you get should look similar to the image below.

Continue using the rule all the way around.
So the next step would be two of color2 and one color1..
Repeat


Row 3


String into any point or middle bead from row 2.
Here I went into a color2 bead.
*As a rule always add on three colors of the one you went through.
Go through your next point bead.
You will get something similar to the image below.

You will string on three of the color you just went through as the rule says and go into the next point bead.


In my case I would string on three of my color 1 beads since that is what I went through.
Continue this all the way around and tie off.
Add fingernail polish if desired and cut off extra string.
You should get something similar to the image below.
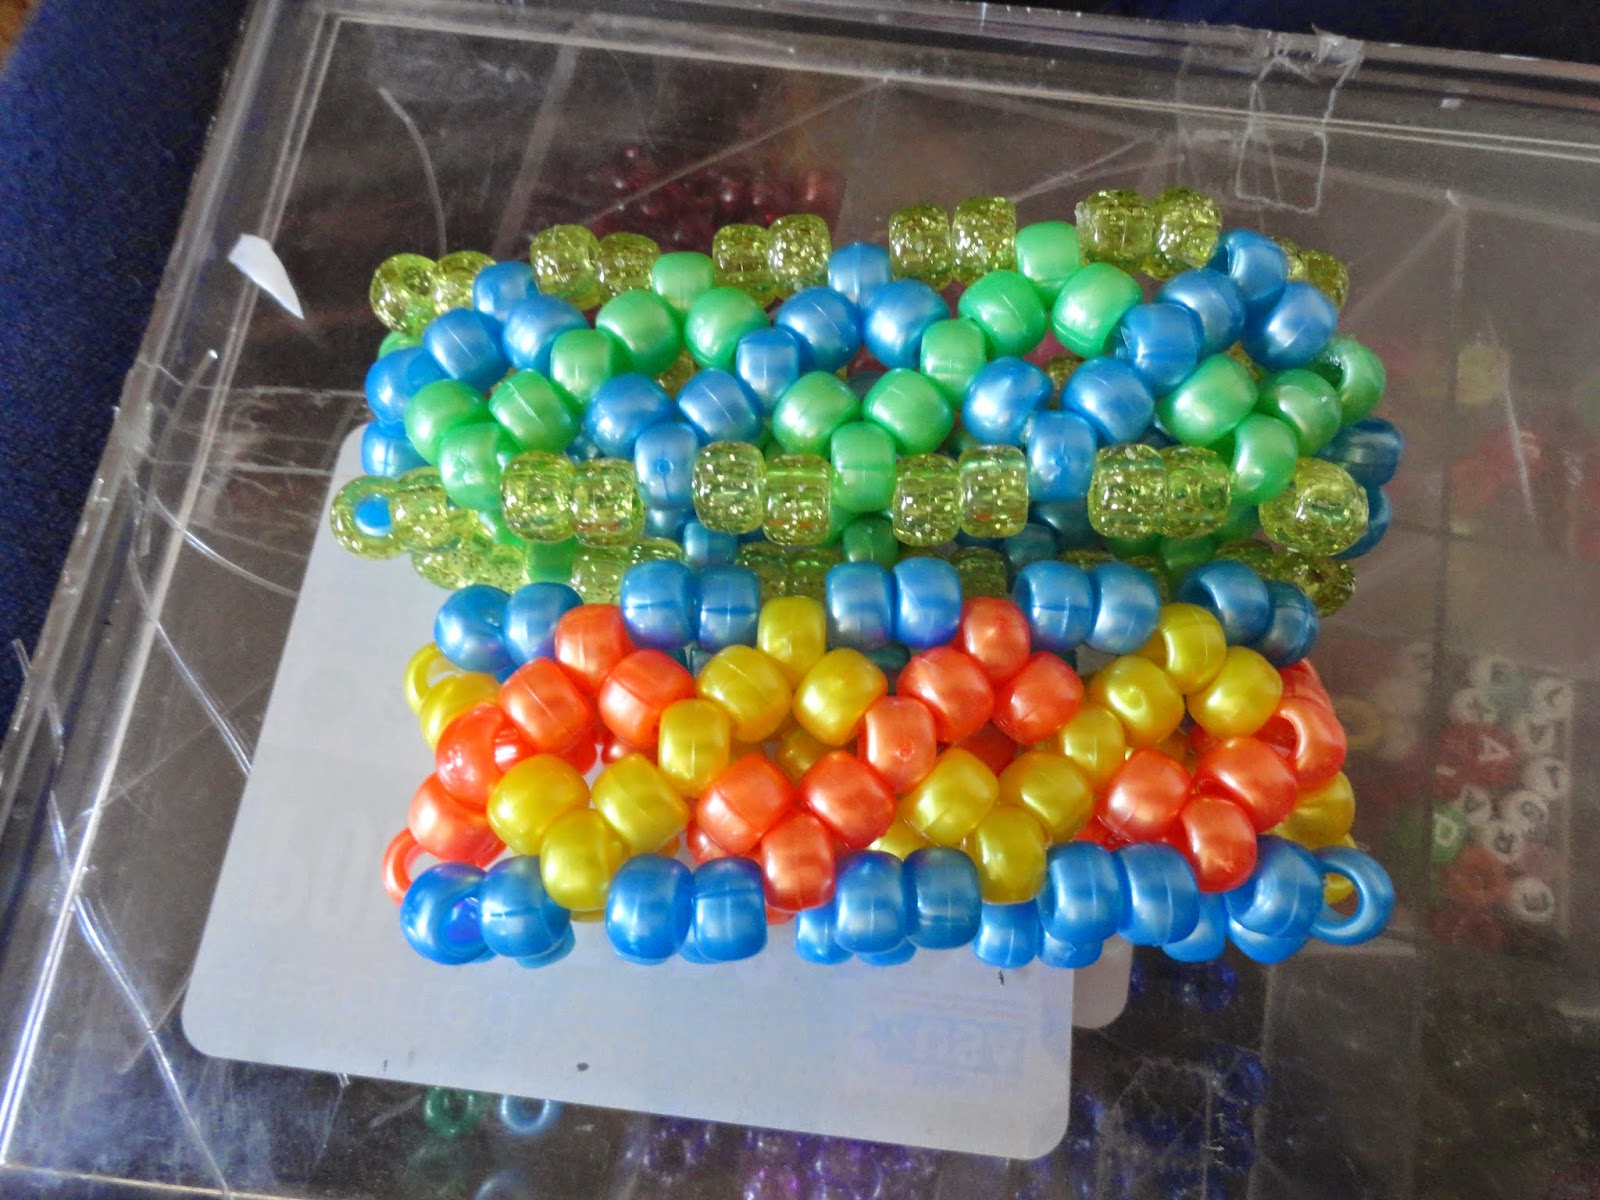
Finishing Off


You will finish off by stringing on two base beads between each point colored bead.
Continue this all the way around.
Tie off and add polish if desired
Cut off extra string
You should get something similar to the cuffs below
Contanct
I welcome everyone to contact me with questions, comments or suggestions.
You can always contact me through this blog or the links below.
trimakasih infonya sangat,,
ReplyDeleteberguna sekali,,
mantap...
Thank you for making this so easy,great tutorial!
ReplyDelete